
Diva QC-7BH
Diva QC-7BH USB Driver for Windows Computer
Diva QC-7BH USB Driver helps you to connect your Diva Device to the Windows Computer and transfer data between the device and the computer. It also allows you to Flash Diva QC-7BH Stock Firmware on your Diva Device using the preloader drivers. Here on this page, we have managed to share the official Diva QC-7BH USB Driver.
It is very necessary to have Diva QC-7BH USB drivers whenever you have to connect Diva QC-7BH to the Pc for the purpose of transferring data or important files. Also, when it comes to updating your Diva QC-7BH manually, it’s necessary to have them on your PC. While you are installing or flashing Fastboot firmware on the device, then Diva USB Drivers are required. Check out the download links given in this post to simply keep up the pace in this matter.

Diva QC-7BH RockChip Driver for Windows (11,10,8,7,XP)
Driver Package Name : Rockchip Driver for windows
Package File Name: Rockchip_Driver_v3.7_(USB-Driver.NET).zip
Driver File Size: 225 KB
How to install Diva QC-7BH Rockchip Driver official on Windows
The Diva QC-7BH Rockchip Driver is compatible with the Rockchip Flash Tool, and the IMEI Tool and can be useful if you are trying to install firmware (ROM) on the device.
Step 1 : Download and extract the Diva QC-7BH driver package on the Computer (The link is above). If in case, you have already downloaded and extracted the driver package, then SKIP this step.

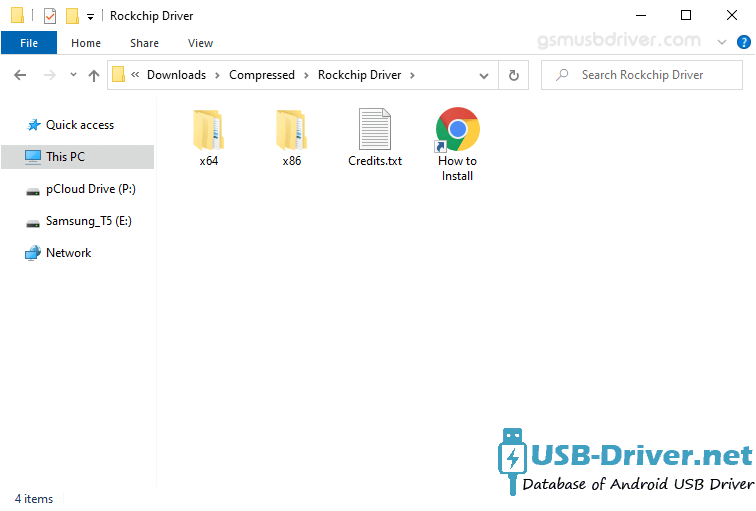
Step 2 : Once the driver package is extracted on the computer, you will be able to see the following files:
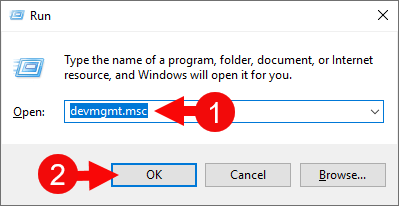
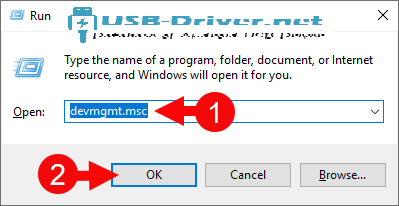
 Step 3 : Open Device Manager on the Computer. Press Win + R key from the keyboard and type devmgmt.msc and Click on OK Button:
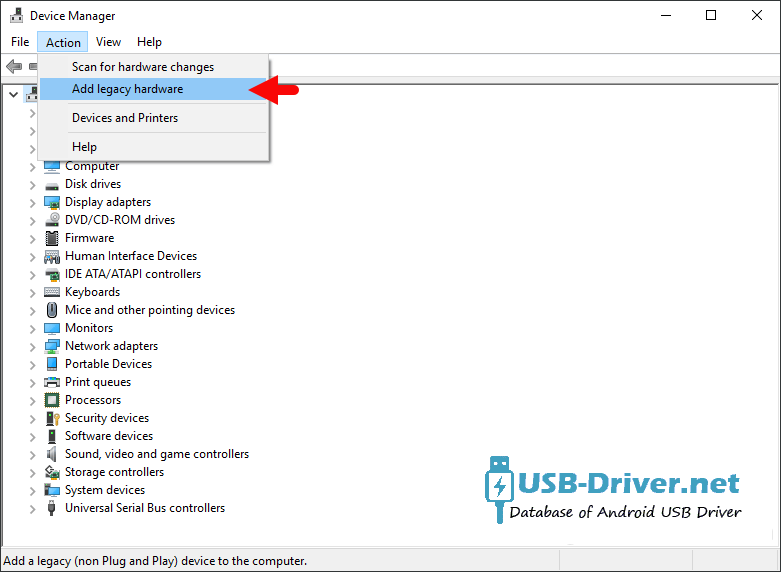
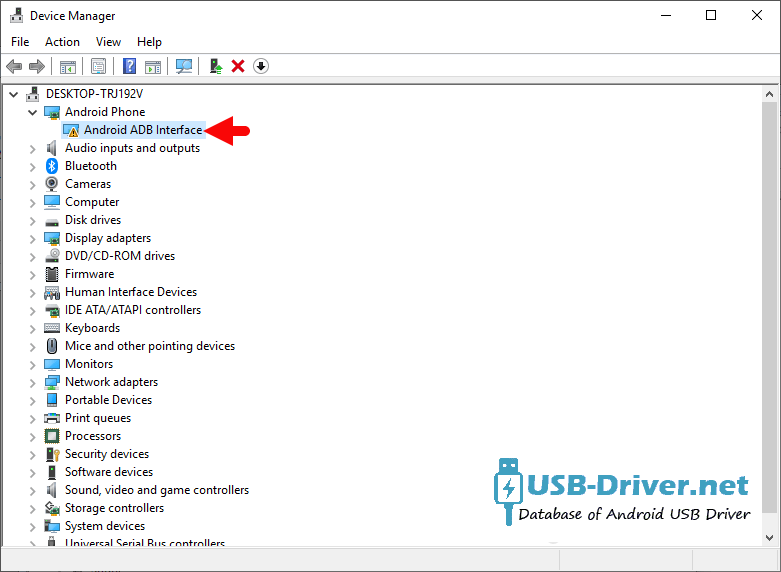
Step 4 : Once the Device Manager is Launched, Click on the Computer Name (name can vary from the image below):
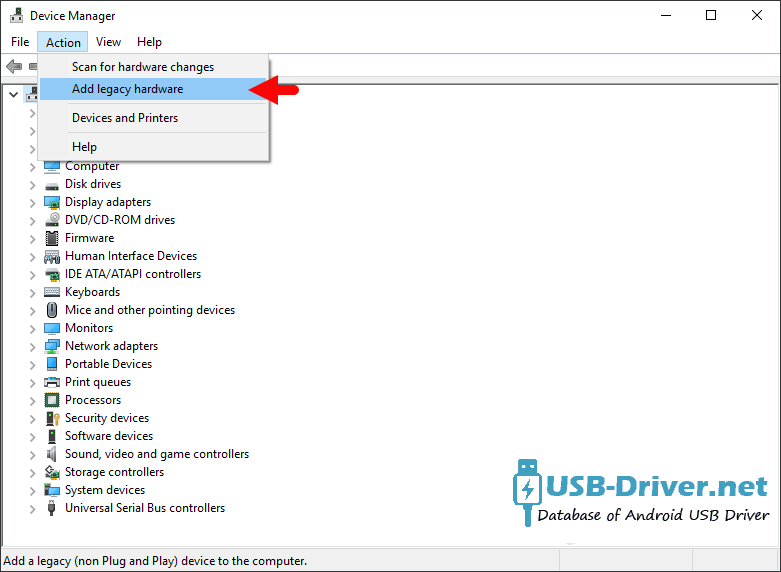
 Step 5 : Click on the Action Menu and Select Add Legacy Hardware option:
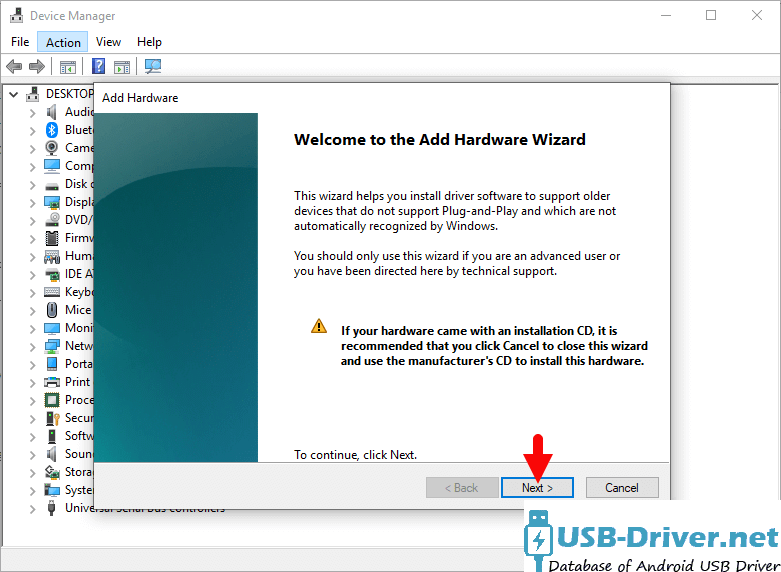
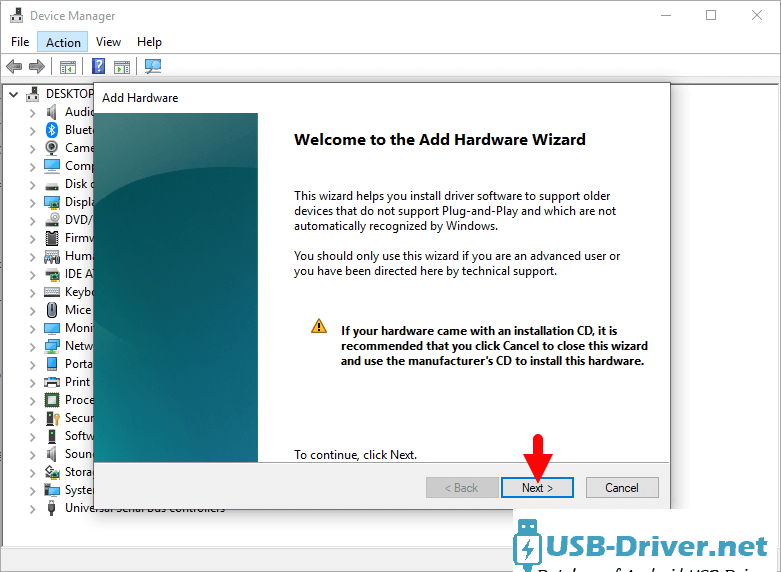
Step 6 : Under Add hardware Dialog Box, Click on the Next Button:
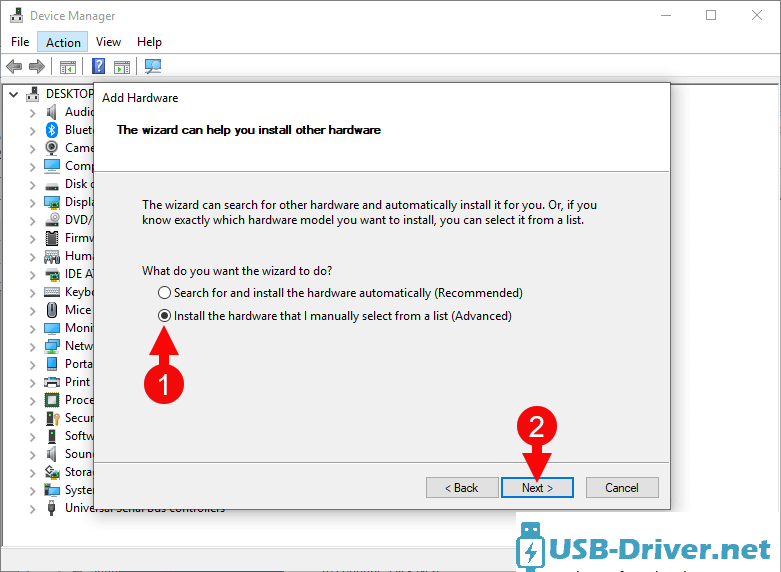
 Step 7 : Tick on the Install the hardware that I manually select from a list checkbox and Click on the Next Button:

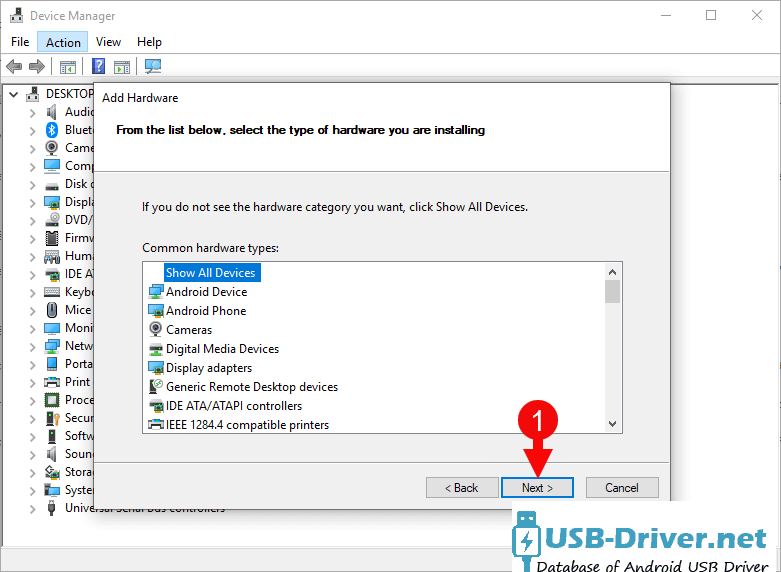
Step 8 : Click on the Next Button:
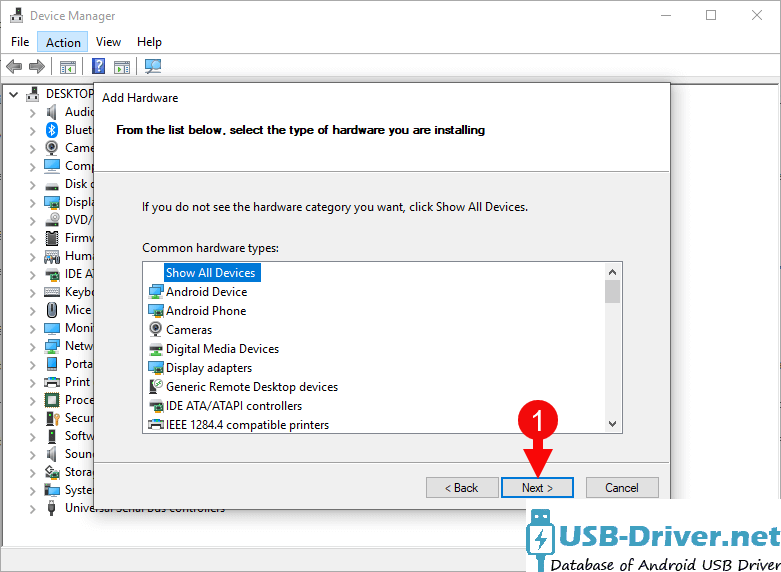
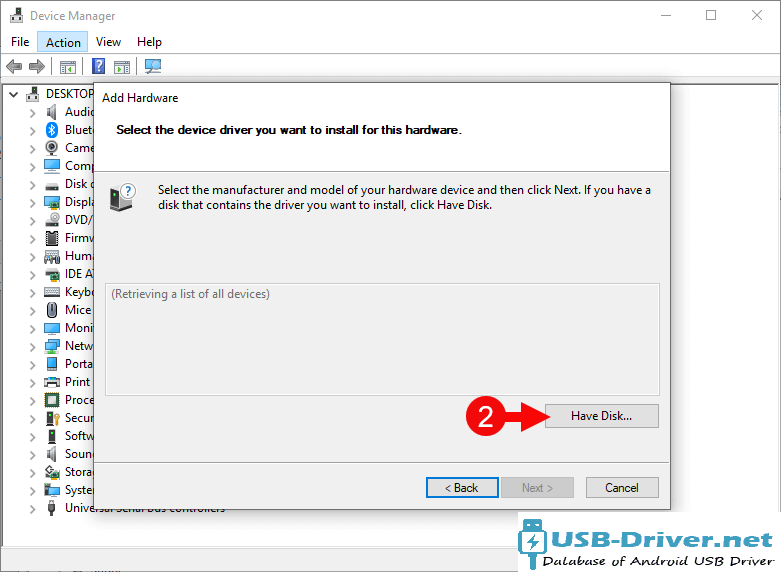
Step 9 : Then Click on the Have Disk Button:
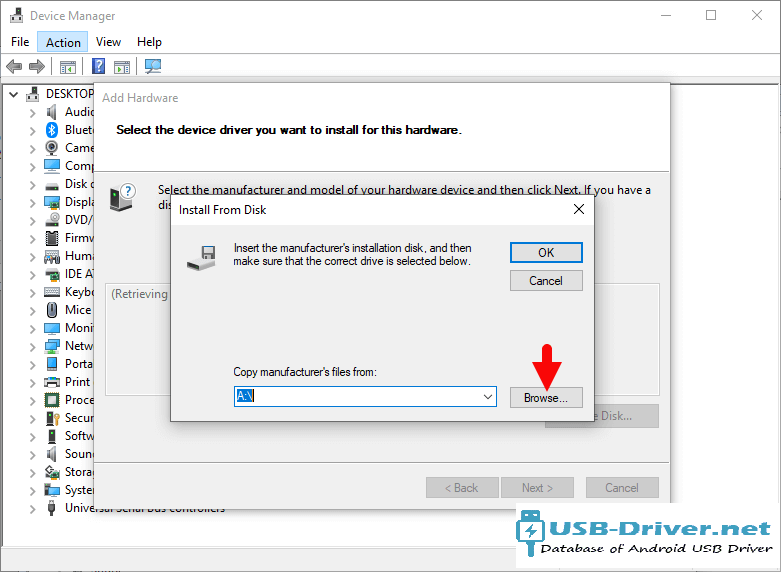
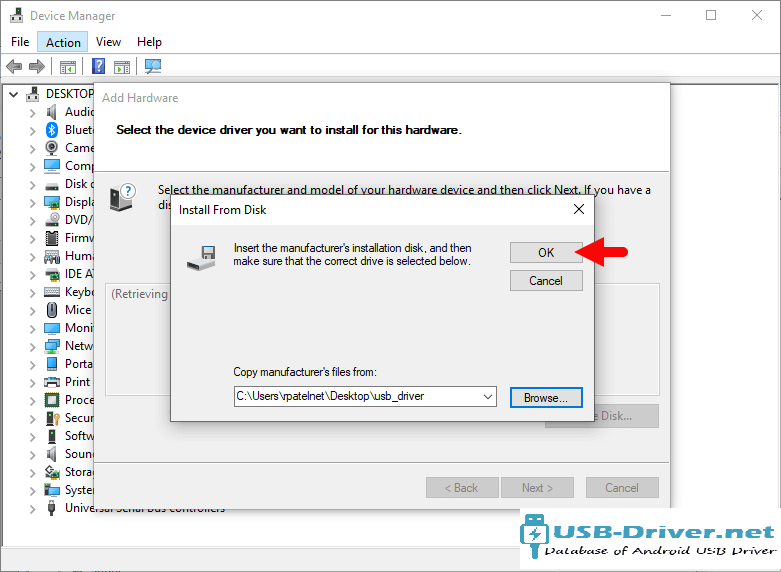
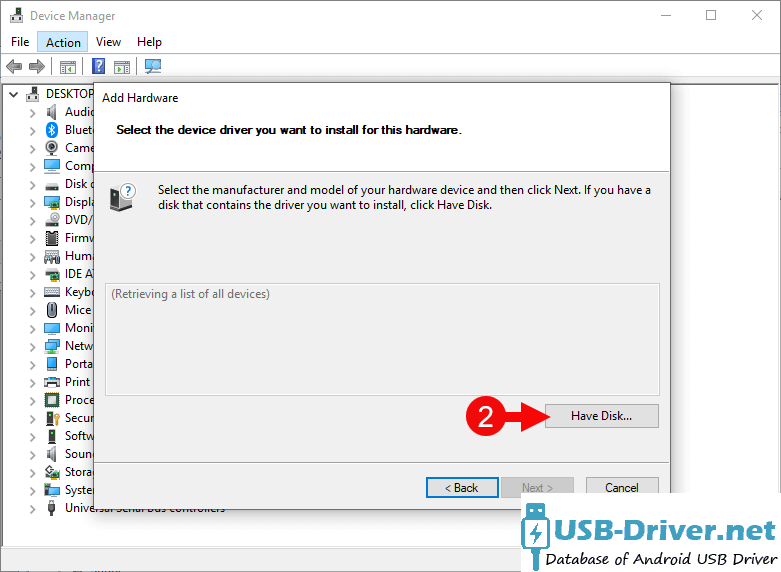 Step 10 : Click on the Browse Button:
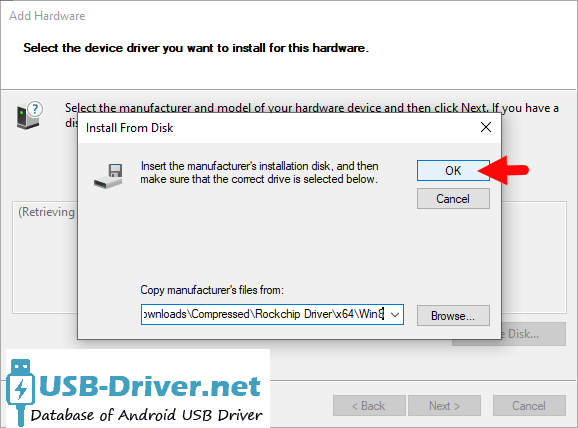
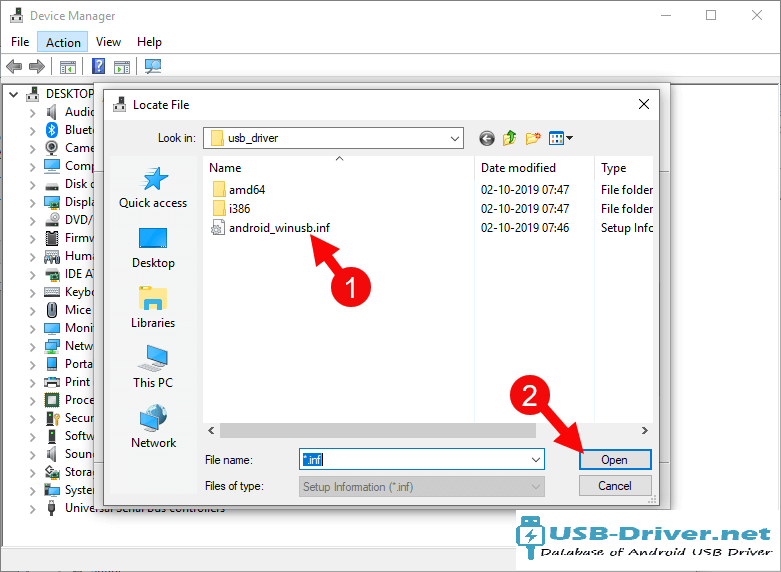
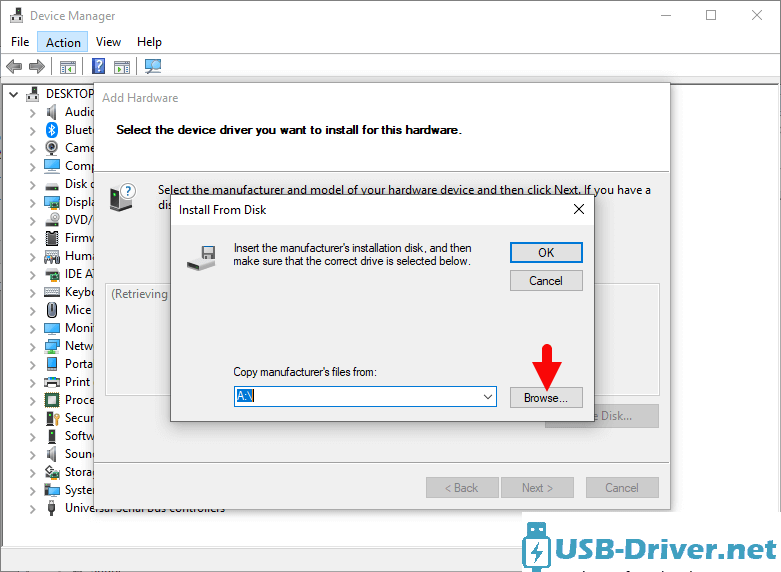 Step 11 : Locate the .inf file from the computer (this file can be found in the extracted driver folder).

Step 12 : Click on the OK Button:
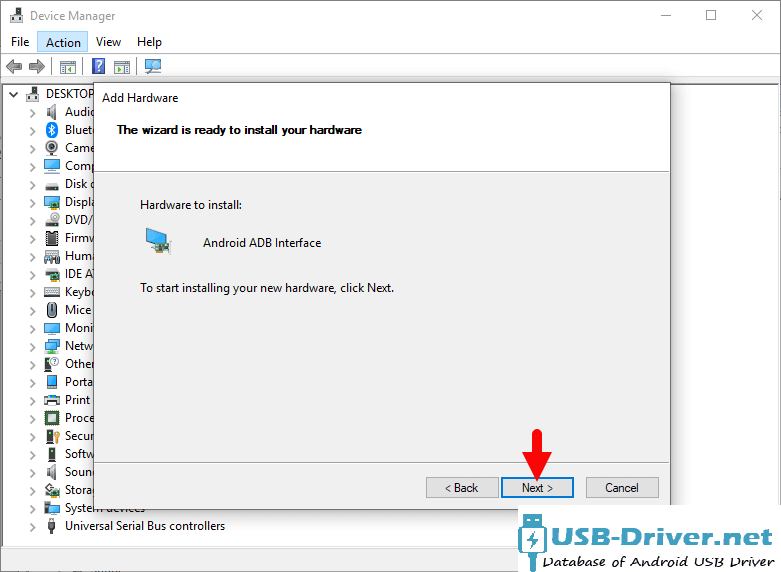
Step 13 : Click on the Next Button:
Step 14 : Again Click on the Next button:
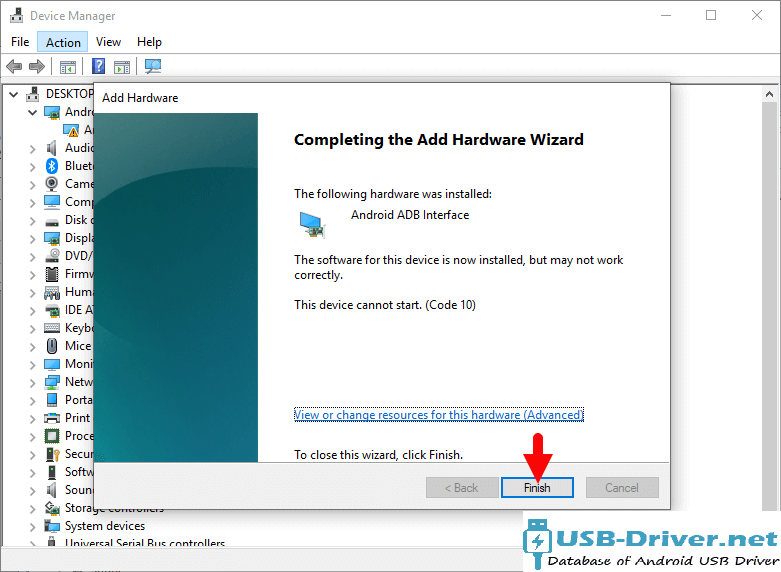
Step 15 : Click on the Finish button to complete the installation process (ignore Code 10; it will be gone post restarting the computer).
Restart the Computer.
Step 16 : Once the computer is restarted, you can easily connect your Diva QC-7BH to the computer without facing any issue.
Diva QC-7BH ADB Driver for Windows (11,10,8,7,XP)
Driver Package Name : ADB Driver for windows
Package File Name: usb_driver_r13-windows_(USB-Driver.NET).zip
Driver File Size: 8.27 MB
How to Install: Follow Guidelines
[•] Download Diva QC-7BH Stock Firmware: If you are looking for the Stock Firmware, then head over to the Stock Firmware page.
How4 to install Diva QC-7BH USB drivers
The Diva QC-7BH USB driver makes almost every task that needs to be performed by connecting the device to PC easier. All the files can be transferred in no time without worrying about anything. Also, there are certain benefits to having it. Before you proceed to download, it is suggested to you to remove the previously installed Diva QC-7BH from your PC in case you have installed it. Once you are done, click the below link to download Diva USB Drivers on your PC.
How to install Diva QC-7BH ADB Driver on Windows
Diva ADB Driver can be used to connect the Diva to the computer and transfer data between the mobile and the computer.
Step 1 : Download and extract Diva QC-7BH ADB Driver (.inf based) (The link is above) on the Computer. If in case, you have already downloaded and extracted the driver, then SKIP this step.
Step 2 : Open Device Manager on the Computer. Press Win + R key from the keyboard and type devmgmt.msc and Click on OK Button:
Step 3 : Once the Device Manager is Launched, Click on the Computer Name (name can vary from the image below):

Step 4 : Click on the Action Menu and Select Add Legacy Hardware option:
Step 5 : Under Add hardware Dialog Box, Click on the Next Button:
Step 6 : Tick on the Install the hardware that I manually select from a list checkbox and Click on the Next Button:
Step 7 : Click on the Next Button:
Step 8 : Then Click on the Have Disk Button:
Step 9 : Click on the Browse Button:
Step 10 : Locate the .inf file from the computer (this file can be found in the extracted driver folder).
Step 11 : Click on the OK Button:
Step 12 : Click on the Next button:
Step 13 : Again Click on the Next button:
Step 14 : Click on the Finish button to complete the installation process (ignore Code 10; it will be gone post restarting the computer).
Step 15 : Your Diva QC-7BH driver is listed in the Device Manager.
Step 16 : Now, Restart the Computer. Once the computer is restarted, you can easily connect your Diva QC-7BH device to the computer.
[•] Driver Signature Error: If you got Driver Signature Error While installing the Diva QC-7BH Driver then See this Video to fix this problem.
[•] Request Diva Driver: If you are looking for any specific Diva drivers that is not listed above, then you can request it through the comment box below (do not request driver from the contact page, or else it will be ignored).